The general guide to the project portals purpose is to give the reader insight into the portals core functionality, thus making it known to the user what options the portal makes available.
Rights
The project portal use a role system, which enables the possibility to assign specific privileges to a specific user. This makes it possible to restrict and allow seperate restrrictions and allowances in the portal. A set of features in the general guide demands expanded privileges.
Projects
Below the menu point "Projects", a list of acessable projects for your user is displayed. When at project has been selected, the overview for it will be displayed.
Project overview
Project overview is a detailed display of the project details and all pertinent tasks. The project details are as a general rule folded to allow more space for the tasks.
 When the details are unfolded, it also shows the files and folders that belongs to the project (Project documents).
Files and folders
Under "Project documents" it is possible to navigate to the folder tree, and files can be uploaded or downloaded by the users of the portal. To download merely press the filename.

 The upload file functionality is located in the files. If there is many files you will have to "Scroll" to the bottom of the project documents. Top upload a file, first select a file and then click "Upload".
Take care to notice that the file will be imported to whatever folder you are in at the given time.
Project overview in Excel
It is possible to export a snapshot of a project and all pertinent tasks to excell. This feature requires expanded rights, but if you desire a printout you can contact the project manager at Notora. Each time an Excell document is created, it is also saved to the root folder of the project and can at any time be downloaded by all task participants.
Add task
Add task enables users to add tasks to the chosen project. Be aware that there may be a need to affirm mutual expectations regarding estimate and basis of agreement before the task can be initiated. Only the name of the task is mandatory for creation, but it is recommended that as minimum, a summary description of the task is included. At creation the name of the creator and a timestamp is automatically entered.
The task list
The project overview shows all tasks, pertinent to the project. For every task a set of attributes is shown:
- Task ID - a unique ID for this task, which will always stay the same.
- NAV no - show the tasks relation to jobno/jobtaskno in NAV. This number is mostly for internal use. Be warned that this number can change - use "Task ID" to indentify tasks.
- Name - click the task name to navigate to the task.
- Status - task status is describes the stage the task is in. This will continually change in the life-cycle of the task.
- Next action responsible - shows who are, at a given time, responsible for driving the task forward. This will typically vary between the task responsible and other participants untill the task is completed.
- Last activity - When a change to the task has last been performed. By pressing the link in the field a log will be opened describing the last activities.
-
Responsible
- Responsible-Notora - the responsible on the side of notora.
- Responsible-Customer - The responsible on the side of the customer.
- Besides responsible, tasks can also have a number of participants which are now shown in this overview.
- Priority - the tasks priority.
- Area - the area the task is concerning.
task list filtering
It is possible to filter by all task parameters, in order to facilitate an overview of the project.
For example; if you wish to only see tasks within a specific area or with a given status, this can be selected by clicking the arrow next to these fields.
Filters can be combined according to needs, for example; see the illustration below. These filters are designed to follow the same operating principles as Excel.
In the "Status" field the "Completed" tasks is set to hidden by default. This is shown on the illustration below, in that you can see the symbol next to "Status" is a line rather than an arrow. This indicates that there is a filter
in the field in question. Next to the headline "Tasks" a "Clear Filters" button is located. This will load a new page with all filters removed except the filters for "Completed" in "Status".

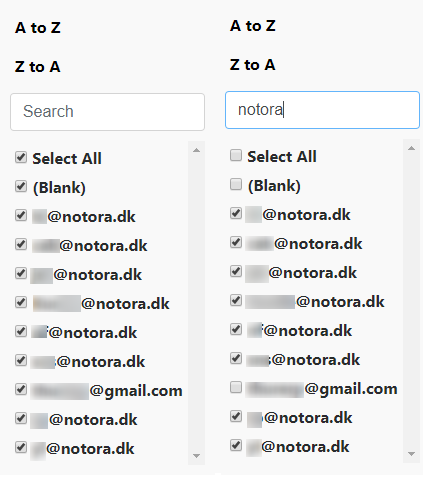
 In the illustration to the right the options for filters and similar. It is possible to sort and filter all collumns and to search for part-text in the search field.
The sorting can for example be used for sorting by priority or tasks.
The search field can be used in the field "Next action responsible", where you can for example search for "notora" and thereby show all tasks wherein a notora user is next action responsible.
This only works due to "notora" being present in all notora-user mail adresses.
Task
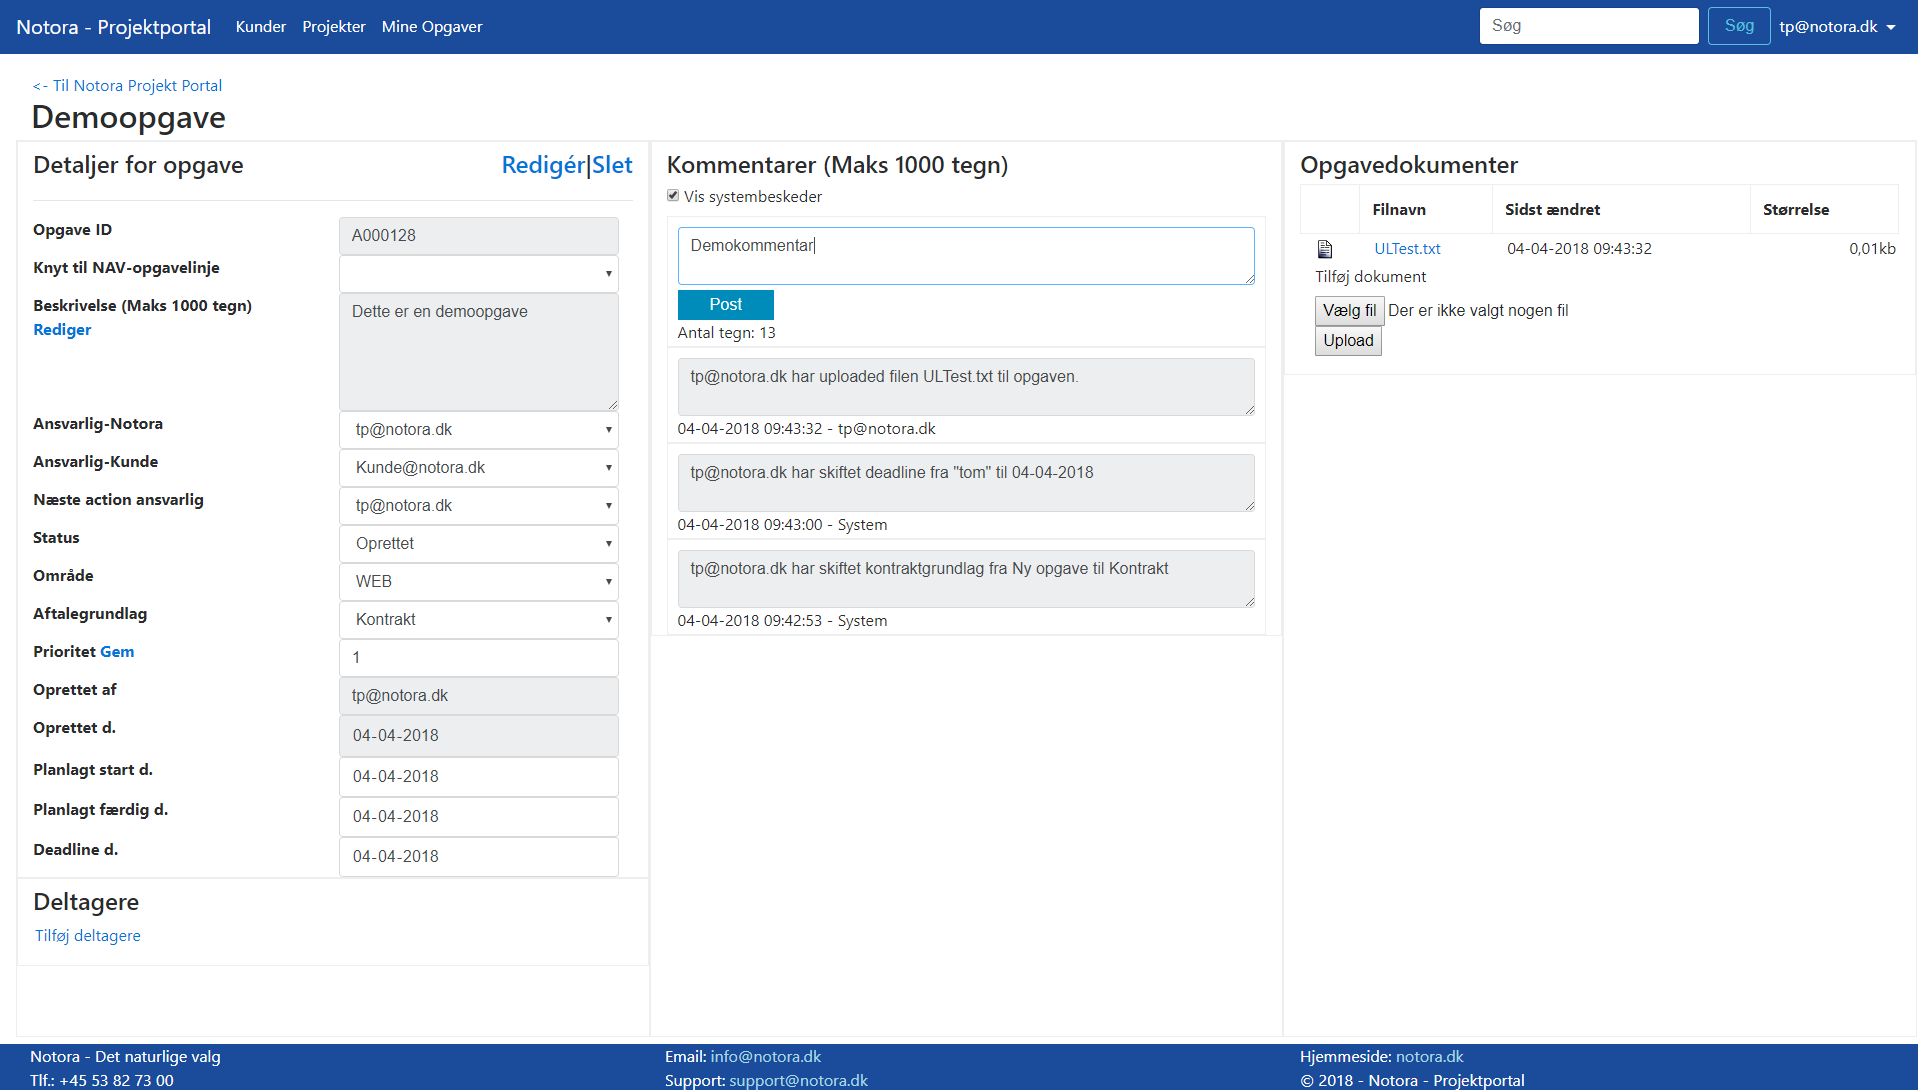
When you navigate to a task, the overview for it is presented.
Task overview
The overview provides a full survey of the task details, including commentary, logs and documents. The overview is divided into 3 sub areas - Details, Commentary and Task documents.

Details
The left side of the overview shows the task details, in addition to this it allows users to make status changes and more. Beneath the details the participant list is shown. In this list it is possible to add and remove participants according to needs. In addition, for some tasks, subtasks can be attached. The subtasks will be shown above the participant list.
Comments
The commentary field in the overwiev enables users to communicate internally on the task. At the same time changes are logged so that participants can track changes.
Task documents
It is possible to upload and download files to each task, in the same manner as shown under the project overview. For more information see Files and folders.
Searching
 It is possible to make searches across customers, projects and "My tasks" with the help of the search field on the right side of the navigation menu. The search can be with whole words or just fragments and will compare with names on customers, project and tasks.